
Coving and Cornice Repair Tips
Coving and cornice can add real character to a home, especially when the design is decorative, intricate, or part of the history of the house. Over the years, coving can become damaged by movement, moisture, poor paint layers, water leaks, or careless decorating. The good news is that many cracks, chips, and small missing areas can be repaired with care, the right tools, and a steady hand.
This step by step guide explains how to repair coving and cornice, how to restore coving without losing the original shape, and when a damaged section may need to be replaced. It also includes tips for restoring victorian coving, removing excess paint, and making repairs that help maintain the original coving for many more years.
What Tools Do I Need to Repair Cornice and Coving?
When repairing coving or cornice, having the right tools is important if you want a smooth finish and a professional result. A sharp utility knife or blade is useful for cutting through old or damaged coving with care. A putty knife, spatula, and small chisel can help you fill small cracks, chip away loose debris, and shape filler or plaster into the moulding. A wide chisel may also be needed where larger sections of damaged material must be removed.
Fine sandpaper is needed to sand rough areas and refine the surface before paint is applied. A brush helps remove dust from nooks and crannies, while a clean cloth and clean water can be used to give the coving a good clean before repair work starts. You may also need mild soap, sugar soap, or a mild detergent to remove grease, residue, and old dirt from the walls, ceiling, and coving surface.
Plaster, filler, adhesive, primer, emulsion, and suitable paint products are also commonly required. If you are restoring old plaster coving, you may need lime plaster or a lime based repair material to match the original material. A ladder or platform is important so you can safely stand while working. Never compromise safety when working near a ceiling. Ensure the platform is firm, and avoid overreaching, as this can cause accidents and poor repair results.
Assess the Damage Before You Start
Before you repair coving, take time to assess the extent of the damaged area. Look for cracks, water stains, loose pieces, missing detail, soft material, and signs of moisture. Damaged coving may only need a simple fix if the cracks are small, but more serious damaged areas may need to be rebuilt, replaced, or checked by a professional.
Water leaks are a common cause of damaged plaster and damaged coving. If a leak is still causing moisture, any repair will fail. Find and fix the leak first, then allow the plaster and coving to dry fully. This may take time depending on the size of the area and the condition of the material. Do not apply filler, primer, or paint to damp plaster, as the finish may crack, peel, or become covered in stains again.
Older homes often have victorian coving with fine moulding, crisp edges, and decorative features. If the original coving is still in place, the key aim should be to preserve as much detail as possible. Restoring victorian coving takes patience because the layers of paint can hide the original shape and soften the moulding lines. When in doubt, discuss the job with a professional, especially if the coving has historic value.
Clean the Coving and Cornice First
A clean surface helps plaster, filler, primer, and paint stick properly. Start by using a soft brush to remove dust and loose debris from the coving, cornice, walls, and ceiling. Then wipe the surface with a damp cloth and clean water. For greasy areas, use sugar soap, mild soap, or a mild detergent. Do not overload the coving with water, as too much moisture can damage plaster and may cause old paint to lift.
Cleaning is also a good way to find hidden cracks, lumps, and weak areas. Paint can cover small cracks, but it can also hide larger problems. Once the coving is clean and dry, check the front facing groove, corners, right angles, other lines, and moulding detail. This careful inspection will help you decide whether to fill, skim, strip, rebuild, or replace the damaged section.
Need assistance finding coving and cornice repair near you?
Get a QuoteRemove Loose Paint and Excess Paint Carefully
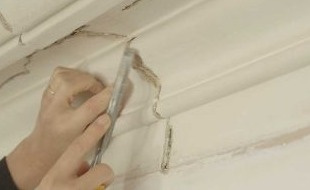
Many older rooms have coving that has been covered with thick layers of paint. These layers can fill the detail, soften edges, and hide the original shape. If you want to restore coving properly, you may need to strip some paint before making repairs. Use a scraper with care and avoid digging into the plaster. A small chisel can help remove stubborn lumps, but use it gently so you do not chop into the moulding.
A paint stripping product can help soften old paint, especially on intricate Victorian coving. Always read the product guide before use, and choose products suitable for indoor plaster. Some people use a poultice blanket with a paint stripping product to draw paint away from detailed moulding. This method can be useful when restoring decorative coving because it can reach small nooks and crannies without needing hard scraping.
When you strip paint, work in small sections and keep the area well ventilated. Old paint may contain harmful particles, especially in older properties, so wear suitable protection and prevent dust from becoming airborne. After stripping, wipe the coving with a cloth and clean water to remove residue. Leave it to dry before adding any plaster, filler, primer, or paint.
Repairing Small Cracks in Coving
Small cracks are common where coving meets the ceiling or walls. They may be caused by small movement in the house, poor installation, drying plaster, or moisture. To repair small cracks, first scrape away loose paint and dust. Use a small amount of filler and apply it with a putty knife or spatula. Press the filler into the cracks, then smooth the surface without adding too much material.
Allow the filler to dry fully before you sand. Use fine sandpaper and sand gently, keeping the original shape of the coving in mind. The aim is to create a smooth repair without flattening the moulding. If the cracks are still visible, apply a second thin coat and sand again once dry. This careful method helps create a seamless finish and makes the repair easier to hide with primer and paint.
Repairing Damaged Coving and Missing Detail
For damaged coving with chips, holes, or missing moulding, the repair process needs more care. Start by removing loose debris with a brush, blade, small chisel, or scraper. If there is a hole or soft plaster, remove only the damaged material. Do not remove more than needed, as keeping the original material helps preserve the character and shape of the coving.
Build the damaged section slowly with plaster or filler. Apply the first coat, then allow it to dry before adding more layers. This is better than trying to fill the whole space at once. Thick filler can crack, slump, or dry unevenly. Thin layers give better results and help maintain the moulding detail.
How to Repair Victorian Coving
To repair Victorian coving, begin by checking the condition of the plaster, the layers of paint, and the depth of the moulding. Victorian coving often has intricate detail, so the repair should preserve as much original shape as possible. Remove dust, strip excess paint where needed, and clean the surface before adding any new material.
When you repair Victorian coving, match the repair material to the original coving wherever possible. Lime plaster may be better for some older homes because it works well with traditional plaster. Modern filler can be suitable for small cracks, but larger restoration work may need plaster that behaves more like the old material. This helps maintain the condition of the coving and reduces the risk of future cracks.
If part of the moulding is missing, you may need to copy the shape from a good section nearby. A profile tool can help, or you can carefully build the shape by hand. In tricky cases, a new piece may be cast or cut to match the damaged section. Repair Victorian coving in small steps, and do not rush the finish. The aim is to restore coving so the repair blends into the rest of the room.
When a Section Needs to Be Replaced
Some damaged coving can be repaired, but some sections are too weak, broken, or damp to save. If the plaster has failed, if a large piece has fallen away, or if the coving has been badly damaged by water leaks, the damaged section may need to be replaced. In these cases, remove the loose material carefully and check the wall and ceiling behind it.
When adding a new piece of coving, measure the space, check the angles, and dry fit the piece before applying adhesive. Cutting needs care, especially around corners and right angles. A new piece should match the size, style, and moulding of the existing coving. If it does not match, the repair will be easy to see once painted.
After the new piece is fixed in position, fill the joints, sand the surface, and apply primer before paint. Take care where old and new material meet. A seamless repair depends on good preparation, careful filling, and patient sanding. If you are unsure about matching old decorative coving, a professional with restoration experience may be the best solution.
Should You Repair or Replace Cornice and Coving?
Deciding whether to repair or replace coving depends on the extent of the damage, the cost, and the value of the original features. If the coving has small cracks, chips, or light surface damage, repair is often the most suitable choice. It can save time, reduce cost, and help preserve the character of the home.
If the coving is badly damaged, loose, or missing large pieces, replacement may be needed. This is especially true if the damaged material will not hold filler or plaster. However, original coving in older homes should not be replaced without careful thought. Restoring original moulding can help maintain the history, design, and style of the room.
The cost of repair is usually lower than full replacement, but repeated repairs can increase the total cost over time. If the same cracks return, there may be a hidden problem causing movement or moisture. In those cases, find the cause before making another repair. Good planning can prevent wasted work and help the coving stay in good condition for years.
Painting After the Repair
Paint should be the final step, not a way to hide poor preparation. Once the plaster or filler is dry, sand the repair until it is smooth. Remove dust with a soft brush and wipe with a clean cloth. Apply primer to new plaster or filler so the paint bonds evenly. Without primer, the repaired area may absorb paint differently and leave a patchy finish.
Choose a paint that matches the rest of the coving and cornice. A lighter colour can highlight decorative moulding and help the room feel brighter, but it can also show rough repairs if the surface has not been sanded well. Apply paint in thin coats and allow each coat to dry. If needed, apply a second coat of emulsion for a stronger finish.
Use a brush that can reach into detailed moulding without leaving heavy paint marks. Do not overload the brush, as excess paint can fill fine detail and reduce the crisp edges of the design. Taking care at this stage will help the repaired coving look clean, smooth, and well maintained.
In this article: