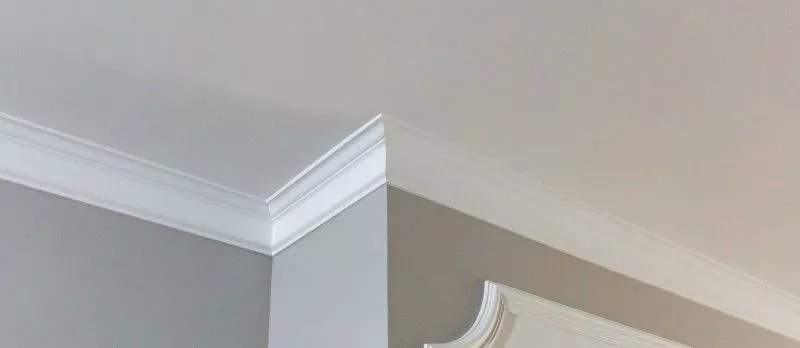
How Do You Repair Damaged Coving?
Damaged coving can make a room look tired, even when the wall and ceiling are in good condition. The good news is that many coving problems can be repaired without replacing the whole run. With careful work, the right tools, and enough time for each layer to dry, you can repair damaged coving and bring it back to a clean finish.
The best method depends on how badly the coving is damaged. Small cracks, chips, holes, and gaps can often be fixed with filler, adhesive, primer, sandpaper, and paint. A missing or broken damaged section may need a new piece cut to match the existing coving. In older properties, plaster coving or a decorative cornice can be more difficult to repair because the pattern may be intricate and the original shape may need to be recreated by hand.
What Causes Damage to Coving?
Coving can become damaged for several reasons. Water leaks are one of the most common causes, especially where damp has softened the plaster or caused the paint to bubble. If the coving feels soft, crumbly, or damp, you should fix the water problem before making any repair. Otherwise, the same damaged coving may return within days or weeks.
Movement in the house can also create cracks. Over the years, small changes in the wall and ceiling can pull the coving away from the surface. This can leave gaps, loose sections, and broken edges. Poor installation can cause similar problems if the adhesive was not strong enough, if the surface was not clean, or if the coving was not held in place while it set.
Accidental knocks can also damage coving. Moving furniture, decorating, or carrying long lengths of wood or other materials through a room can chip corners, crack plaster, or break a piece away from the wall. Even small damage can highlight the area once a lighter colour of paint is used, so it is worth making the repair neatly.
Should You Repair or Replace Coving?
Before replacing coving, check whether a repair would be enough. If the existing coving is still firmly fixed and the shape is mostly sound, you can usually fill small cracks, patch holes, sand the surface, and repaint it. This is often the most cost friendly solution, and it helps preserve original features in older properties.
Replacing coving is usually required when a damaged section is loose, missing, or badly cracked. It may also be the better way if the coving has been covered with many layers of paint and the detail has been lost. In some cases, stripping the old paint can help restore coving, but if the plaster underneath is weak, replacing sections may give a better finish.
Cleaning and Preparing the Area
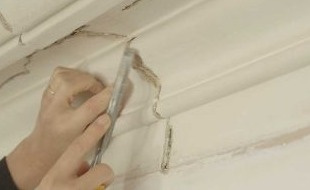
Good preparation is key to a smooth finish. Start by removing loose paint, dust, and weak plaster from the damaged area. Use a brush to clear nooks and crannies, then wipe the surface with a damp cloth. If there is grease or residue, use warm water with a mild detergent, then wipe again with clean water and leave the coving to dry.
Do not rush this step. Filler and adhesive will not stick well to dust, loose paint, or damp plaster. Use a small chisel or scraper to scrape away anything that is loose, but be careful not to chop into sound plaster. If you need to strip old paint, use a gentle method and avoid pulling away the original shape of the coving.
One useful tip is to stand back and check the full run of coving before you fill anything. This helps you find cracks, holes, gaps, and damaged sections that may not be clear from close up. Another tip is to mark the area lightly so you know where to apply filler and where the coving needs support.
How to Fill Small Cracks and Holes
Small cracks and holes in coving can often be repaired with a good filler. Apply a small amount of filler with a filling knife and press it firmly into the cracks. Drag the filler across the surface so it sits slightly proud of the damaged area. This gives you enough material to sand back and create a smooth finish.
For deeper holes, build the filler in thin layers rather than trying to fill the whole space at once. Each layer needs time to dry before the next is added. This helps stop shrinking and cracking. Once the filler is dry, sand the surface carefully until it feels smooth to the hand.
Use a cloth to remove dust after sanding, then apply primer before you paint. Primer helps the new paint cover the repair evenly and stops the filled section showing through. A first coat of paint may still show a slight difference, so apply a second coat if required to achieve a good finish.
How to Repair a Broken Section of Coving
If part of the coving is missing or broken, you may need to cut out the damaged section and insert a new piece. Start by using a sharp knife or small chisel to remove the damaged coving. Try to keep the edges neat because clean edges make it easier to create crisp edges when the new piece is fitted.
Measure the space carefully and cut the new piece to the correct size. Check the ends and make sure the profile matches the existing coving as closely as possible. Apply adhesive to the back of the new piece, then press it into position between the wall and ceiling. Use pins or temporary support if needed to hold it in place while the adhesive sets.
Need assistance finding coving and cornice repair near you?
Get a QuoteHow to Recreate Detail in Plaster Coving
Detailed plaster coving can be tricky because it may include a pattern, raised edges, or an intricate design. If a small area has broken away, you may be able to recreate the missing detail with plaster of Paris, lime plaster, or a suitable repair mix. The right product depends on the age of the coving and the type of plaster already in place.
In some cases, a mould can be made from an undamaged section of the original coving. A release agent is applied first so the mould does not stick. The mould can then be used to create a patch that matches the design. Once the patch is dry, it can be fixed in situ with adhesive or fresh plaster.
This kind of restoration needs a careful hand. You may need to build the shape slowly, sand it gently, and use a small chisel to refine the crisp edges. If the pattern is complex, a plasterer may be the safest option, especially if you are worried about damaging original features.
Can You Put New Coving Over Old Coving?
You can place new coving over old coving in some cases, but it is not always recommended. If the existing coving is loose, damp, cracked, or covered in weak paint, the new coving may not stick properly. This can create a bigger problem later because the old material may pull away from the wall or ceiling.
If the old coving is firm and only has small cracks, covering it may work. However, it can change the size and shape of the coving, which may not suit the room. It can also cover detail and make corners look bulky. For a better finish, it is often best to remove the damaged material, clean the surface, and repair or replace sections properly.
How to Paint Repaired Coving
Painting is the step that brings the repair together. Once the filler, plaster, or adhesive is dry, sand the surface until it is smooth. Remove dust with a clean brush or cloth, then apply primer to the repaired area. Primer helps the paint stick and makes the repair less visible.
Apply the first coat of paint evenly and leave it to dry. A second coat will usually give a stronger finish, especially if the coving has been patched in several places. A lighter colour can highlight lumps, cracks, or rough edges, so check the surface before the final coat.
Use a steady hand where the coving meets the wall and ceiling. Good painting helps create crisp edges and a clean line around the room. If the paint has run, wipe it while wet or sand it gently once dry, then apply another thin coat.
Useful Tips for a Better Finish
One of the best tips is to work slowly. Coving repair is not difficult in every case, but it can become messy if you rush. Let filler, plaster, adhesive, primer, and paint dry fully before moving to the next step. This will help you achieve a smooth finish and a stronger repair.
Another tip is to use the right tools. A knife, filler knife, small chisel, brush, cloth, sandpaper, and a stable step are often enough for small coving repair work. For larger sections, you may also need a mitre box to cut corners, support pins, adhesive, and a matching new piece.
Always check the shape from different angles. Coving is seen from below, so a repair that looks fine close up may look uneven from the floor. Use your hand to feel for ridges, then sand lightly until the surface is smooth. This simple check can make the finished coving look much better.
Use products that suit the material. Plaster filler is a good solution for many small repairs, while lime based products may be better for some older properties. If you are not sure what to use, read the product information or contact a skilled tradesperson to discuss the best way to restore coving in your home.
Think about the cost, the time needed, and the level of detail before you start. Plain coving is easier to fix and replace than a detailed plaster cornice. Decorative plaster coving can be expensive to match, but careful restoration can protect the original coving and return the room to its former glory.
When to Hire a Plasterer
A plasterer is recommended when the damaged coving is large, loose, or highly detailed. Repair work around a decorative cornice can be difficult because the pattern must be matched and the edges must look natural. A skilled plasterer can repair coving, recreate missing detail, and restore the original shape without making the section look patched.
Hiring a plasterer can increase the cost, but it may save money in the long run. A poor repair can crack, fall away, or need replacing again. Professional restoration is often a good choice if the coving is part of the original features of the house or if the room has a detailed design that you want to keep.
Before choosing someone, check their experience with coving and plaster repair. Ask to see examples of previous work and make sure they are happy to explain the method they would use. You can contact local tradespeople by phone or email and request information about cost, time, and the products they plan to use.
How Much Does Coving Repair Cost?
The cost of coving repair depends on the size of the damaged area, the type of coving, and whether you repair it yourself or hire someone. Small cracks and holes are usually cheap to fix because you may only need filler, sandpaper, primer, and paint. Replacing sections costs more because you need a new piece, adhesive, cutting tools, and more time.
Decorative plaster coving can be more expensive, especially when a mould must be made to match the original coving. The cost can also rise if the ceiling is high, the corners are difficult, or water damage needs to be fixed first. In some cases, full replacement may be more practical than trying to restore badly damaged sections.
For a clear price, give the tradesperson photos, sizes, and a short guide to the problem. Explain whether the coving is plaster, wood, or another material. This helps them return a more accurate quote and decide whether the repair can be carried out in one visit or over a couple of days.
Final Checks After the Repair
After the coving has been repaired and painted, check the whole area in daylight. Look for cracks, gaps, rough patches, or paint marks on the wall and ceiling. If you find a small fault, sand it gently, apply a little filler if required, then repaint the area.
Keep an eye on the repair for a few days after the work is finished. If cracks return quickly, there may be movement, damp, or a hidden water leak. In those cases, the coving repair is only part of the solution, and the cause should be fixed before more restoration work is done.
With careful preparation, the right method, and patient finishing, damaged coving can often be restored without replacing the whole room. Whether you fix it yourself or ask experienced guys to carry the work out, the aim is the same: clean lines, strong adhesive, smooth plaster, neat paint, and coving that looks good today and for years to come.
In this article: