Can You Install Coving Yourself or Should You Hire a Professional?
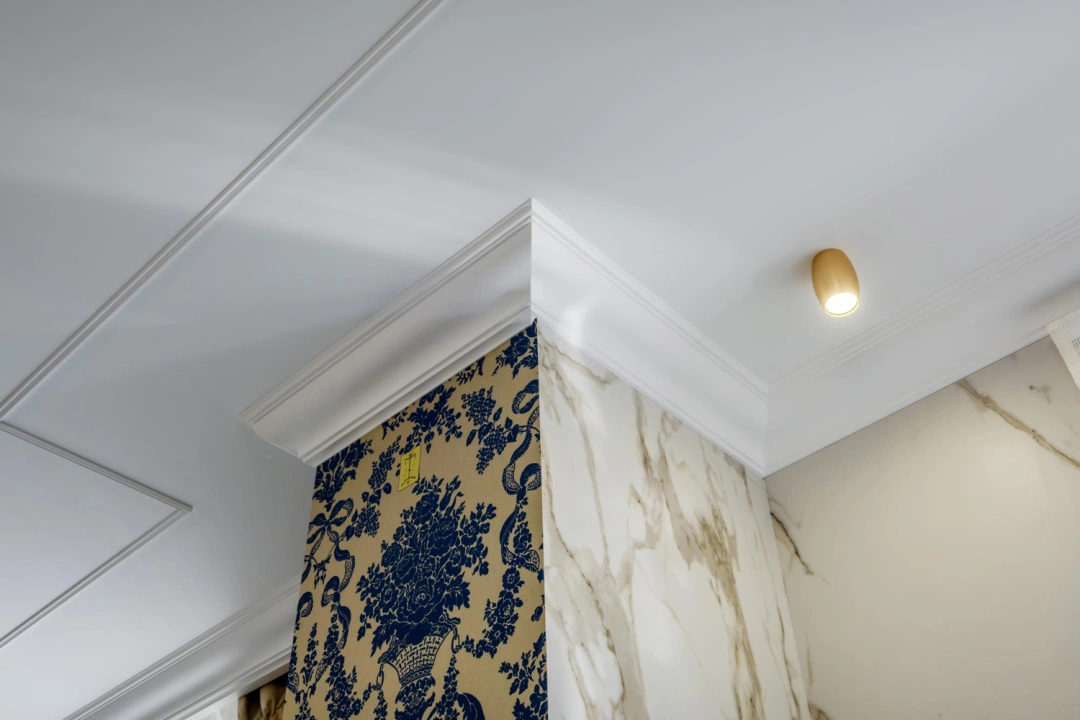
Coving is a decorative feature that can completely change the look of a room. By softening the sharp edge where walls meet ceilings, it gives the space a more finished and elegant feel. It can also make the ceiling appear higher and the room larger, which is why it is such a popular choice in both modern and traditional homes. Whether you live in a flat or a large house, coving can add character that plain walls and ceilings may lack.
The question many people ask is whether they should attempt to install coving themselves or hire a professional. Doing it yourself can save money and give you a sense of achievement. However, hiring an expert can ensure a perfect finish that lasts for years. Both options have advantages and disadvantages, and the right choice often depends on your skills, budget, and expectations for the final look.
This article explains what to consider before trying a DIY approach, the advantages of using a professional, and the situations where installing coving yourself may not be the best idea. By looking at both sides, you will be able to decide what works best for your home and lifestyle.
What to Know Before Trying DIY Coving
Taking on coving as a DIY project can be satisfying, but it is not as straightforward as it may first appear. Many people underestimate the skill involved in achieving neat, even joints and smooth lines across an entire room. Before you start, it is worth understanding the main factors that affect your results, from the material you choose to the tools required and the time available.
Understanding the Different Types of Coving
There are several materials used for coving, and each has its own pros and cons. Plaster is the traditional choice, often found in period homes with ornate interiors. It offers a sharp finish that looks beautiful when painted, but it is heavy and tricky to work with. Handling plaster requires care and precision, and it is not forgiving if mistakes are made.
Polystyrene is light, affordable, and easy to cut, which makes it popular for beginners. The drawback is that it does not always look as refined as plaster, even after painting. Polyurethane offers a balance, being stronger than polystyrene but still easy to handle. Choosing the right material is the first step in deciding if you are ready to take on the project yourself.
When choosing, think about the style of your home and the finish you want to achieve. A simple room may suit polystyrene, while a traditional dining room could benefit from plaster. Polyurethane works well as a middle option for people who want both ease of fitting and durability.
Tools and Materials You Will Need
A mitre box and fine-toothed saw are needed for cutting accurate angles, especially in corners. Adhesive secures the coving in place, while filler and sandpaper smooth over joints. A spirit level keeps lines straight, and a measuring tape ensures each piece fits correctly. Safety items such as goggles, gloves, and a sturdy step ladder make the work safer and more comfortable.
Having everything ready before you start is important. Stopping midway to buy missing tools can break your focus and increase the chance of mistakes. Planning ahead ensures a smoother process from beginning to end.
Measuring and Cutting Accurately
One of the biggest challenges in DIY coving is achieving clean cuts. While walls usually meet at right angles, they are often slightly uneven, which can cause gaps. A mitre box helps, but practice is still needed. Cutting a spare piece first and testing it in the corner can prevent mistakes. Always double-check measurements before cutting to avoid waste.
Accuracy matters because poorly cut corners stand out once painted. Even small gaps can draw the eye and reduce the overall effect. Taking your time here is vital to making your project look professional.
Time and Effort Involved
DIY coving takes longer than most expect. For a small room, you might spend several hours cutting, fixing, and smoothing. A medium-sized living room may take a full day, especially if you are learning as you go. Larger or more complex spaces will take even longer. While it is not physically demanding, it
Need assistance finding coving, cornice and mouldings near you?
Get a QuoteThe Benefits of Professional Coving Installation
One of the strongest reasons to hire a professional is the quality of the finish. Experienced tradespeople know how to measure and cut with precision, creating clean lines that are difficult to achieve without practice. With plaster in particular, mistakes can be expensive and hard to correct, but professionals handle the material with confidence.
Time is another major factor. A professional can often complete a room in a few hours, while a DIY installer may take an entire weekend. If you plan to install coving throughout your home, hiring help saves you days of work and reduces disruption.
Professionals also bring the advantage of high-quality tools and knowledge of adhesives. They know how to deal with uneven walls and ceilings quickly, ensuring coving is secure and long-lasting. A professional finish can even increase your property value, as neat details often make a strong impression on potential buyers.
When DIY Might Not Be the Best Option
DIY coving is not suitable in every situation. Rooms with unusual layouts, curved walls, or high ceilings are more difficult and often need expert skills. Attempting these as a beginner may lead to uneven results or wasted materials.
Heavier materials such as plaster also make DIY harder. They need strong adhesive and careful handling, and the risk of sections falling if fitted incorrectly should not be ignored. Safety is a key concern, and plaster coving is best left to those with experience.
Time is another limitation. If you have a busy schedule, finding the hours needed may be difficult. A half-finished project can leave your home looking messy, and correcting mistakes often takes even longer. In such cases, paying for professional help is usually the better choice.
Deciding What’s Right for Your Home
Choosing between DIY and professional coving depends on your skills, budget, and expectations. Both approaches can work well, but the right choice varies from home to home. Thinking about your circumstances will help you make the best decision.
Think About Your Skills and Confidence
If you enjoy DIY and have handled projects before, coving can be a rewarding challenge. Success brings pride and the satisfaction of improving your home yourself. If you lack confidence or struggle with detail, the final look may disappoint, making professional help the safer choice. Asking yourself how much patience and focus you can bring to the project is often the best starting point.
Balance Cost Against Quality
DIY is usually cheaper, especially with lightweight materials, but mistakes can add cost. Professional installation is more expensive but provides lasting quality and a high standard of finish. Consider whether saving money now is more important than achieving the best result in the long term. For many homeowners, the extra expense of hiring a professional is justified by the peace of mind and reliability it brings.
Match the Choice to Your Home’s Style
Modern homes may suit simple coving that can be fitted without much difficulty. Traditional homes with ornate features often need the skill of a tradesperson. Matching the method to your property style ensures the coving looks natural and enhances the room. Taking into account the character of your home makes it easier to choose the method that will complement the space rather than clash with it.
Both DIY and professional approaches can succeed when chosen carefully. With planning, realistic expectations, and the right decision for your home, coving can add elegance and value that lasts for years. Whether you do the work yourself or bring in an expert, the end result can make a real difference to the look and feel of your living space.
In this article: