How to Prevent Future Cracks After Your Plaster Has Been Repaired
When a crack appears in a wall that was recently fixed, it can feel quite disappointing. It may seem like the time and effort spent on the repair have gone to waste. But cracks do not have to return if you take the right steps early on. A proper plastering repair means more than filling a gap. It involves stopping the issue from happening again.
Many people believe that once the wall looks smooth, the work is done. This is not always true. Plaster takes time to dry and settle. If the wall beneath is damp or the surface is not treated well, cracks may come back. Even minor errors in care can lead to major damage later.
This article will guide you through how to avoid that. You will learn what causes cracks to return, how to use the correct repair method, and how to care for plaster once the job is finished. With the right steps, you can keep your walls strong and free from damage.
Everything is explained in clear, simple language. Whether you are fixing a small area or a whole room, these tips can help you get better results. With just a little planning and attention, you can avoid future plaster problems completely.
What Causes Plaster to Crack Again After Repairs
Cracks may return after repairs for several reasons. These can relate to how the plaster was applied, the surface underneath, or problems within the building itself. Spotting these issues early helps prevent more damage.
Building Movement
Over time, buildings shift slightly. This can be due to changes in temperature, moisture, or how the ground settles. If the plaster is too stiff or thin, it may crack where the wall bends or shifts, especially near joints or corners.
Using flexible joint tape or mesh can help. These materials allow for small movements without damaging the plaster. It is a small step that adds strength where it is needed most. Walls that have had many repairs before may need extra support too.
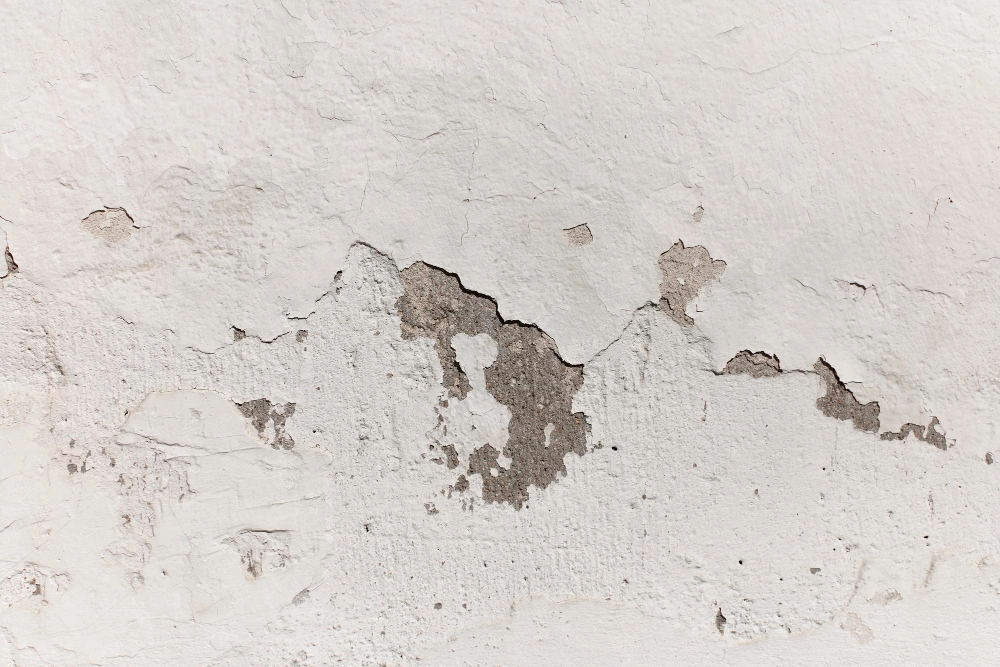
Moisture in the Wall
Water is a key reason why plaster fails. Leaks from roofs, pipes or bathrooms, as well as rising damp, can soak into walls. Even if the surface looks dry, the inside might still hold moisture. This can make repairs less effective over time.
If plaster is applied over a damp area, the water inside will try to escape. This can create bubbles, flakes, or fresh cracks. Always dry the wall properly and fix any leaks before beginning a plastering repair. Skipping this step is one of the most common reasons for plaster problems to return.
Poor Surface Bond
Plaster needs something to grip onto. If the wall is dusty, oily, or too smooth, the plaster may not stick well. This creates weak spots where cracks may start later.
Clean the surface and apply a bonding agent if needed. Roughen any smooth areas with sandpaper so the new layer can hold on properly. Preparation is key to a lasting repair. Skipping cleaning or priming makes future cracks more likely.
Too Fast Drying
The plaster must dry slowly and evenly. If it dries too quickly because of heaters or strong sunlight, the outer layer hardens while the inside is still soft. This creates tension and leads to cracks.
Let the room stay at a mild, steady temperature. Avoid placing heaters near fresh plaster. Allow natural airflow and avoid strong draughts to help it cure the right way. Rushing the drying stage causes more harm than good.
Need assistance finding plastering repair near you?
Get a QuoteWhy the Right Materials and Technique Make All the Difference
Choosing the right plaster and applying it properly is key to avoiding future cracks. Not all types of plaster suit every wall. For example, old brick walls often need lime plaster, which allows moisture to pass through and can handle small movements. Newer walls usually take gypsum plaster, which sets quickly and gives a smooth finish.
If the wrong material is used, the plaster may not move or breathe like the wall underneath. This leads to cracks and peeling. The mix must also be correct. Too much water makes the plaster weak. Too little and it sets before it can bond. Always follow the maker’s guide and mix in clean tools.
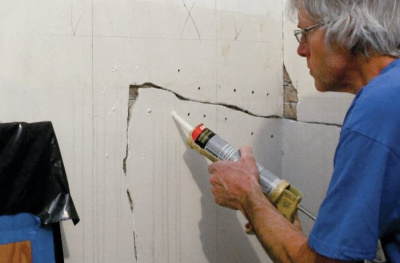
Apply the plaster in thin coats rather than one thick layer. Each coat should partly dry before the next one is added. This allows the surface to dry evenly and helps avoid weak patches that may crack later. It also helps the plaster grip each layer better and spread smoothly across the surface.
Using mesh tape over joins, especially on plasterboard, spreads pressure and stops cracks from forming along the lines. Metal corner beads can be used to protect sharp corners, which are common places for damage. Simple steps like these make a big difference over time.
How Bad Aftercare Can Undo a Good Repair Job
Even when plaster is done well, poor aftercare can lead to problems. The way you treat the wall while it dries matters a lot. Most plaster takes at least a week to dry, sometimes longer depending on the room.
During this time, do not place heaters directly near the wall. Avoid opening all the windows or letting in cold draughts. Keep the room at a steady, warm level and allow some gentle airflow. This helps the plaster set slowly and evenly.
Do not rush to paint. Fresh plaster should be light pink before painting. If it is still dark, it holds moisture. Sealing that in with paint can cause it to bubble or peel. Start with a mist coat, which is a watered-down emulsion. This lets the wall breathe. Follow with two normal coats once the mist coat is dry.
Also, avoid pressing furniture against the wall. Give it space to dry fully. Heavy items close to the wall can trap moisture and lead to soft spots. Move items back after a few weeks when the wall is fully dry and set. Good air flow at this stage makes all the difference.
What You Can Do to Keep Plaster in Good Condition Long Term
Once the plaster is dry and painted, there are a few steps you can take to help keep it in good shape. With regular checks and a stable home environment, your plaster can stay crack-free for many years. These are easy steps that anyone can take without needing special tools.
Keep Temperature and Humidity Stable
Plaster lasts longer in rooms with steady conditions. Avoid letting rooms get too hot or cold. Fit draught seals on windows and use curtains to keep heat in during winter. Use extractor fans in kitchens and bathrooms to clear steam quickly. This keeps moisture from soaking into the walls.
If you notice dampness in a room, use a small dehumidifier. High humidity causes the wall to soak in moisture, which can weaken the plaster over time. A home that feels dry and well-ventilated helps the plaster last longer.
Check for Small Cracks Regularly
Inspect your walls every few months. Look at corners and edges where cracks often form first. If you spot a fine crack, mark it with a pencil and see if it grows. If it does not get worse, you can fill it with a flexible filler and repaint.
Doing small fixes like this helps avoid bigger plastering repair work later. It is much easier to patch a small line than to redo a whole wall. Keeping an eye on small changes helps you act before they become bigger problems.
Use the Right Tools for Minor Fixes
Use flexible filler when doing touch-ups. These fillers move slightly with the wall, which helps prevent future damage. Sand it gently once dry and apply a mist coat before adding top paint. Taking a little extra care at this stage helps maintain a smooth, solid finish.
Avoid using thick paint to cover cracks. This does not solve the problem and often hides signs of damp or deeper damage. If you are not sure why a crack keeps coming back, it may be worth asking a professional for advice. A small repair done the right way saves time and cost later on.
With these steps, your walls can stay strong, neat and free from cracks. A little care after plastering repair goes a long way toward keeping your home looking its best for many years.
In this article: