What to Expect During a Professional Plaster Repair Job
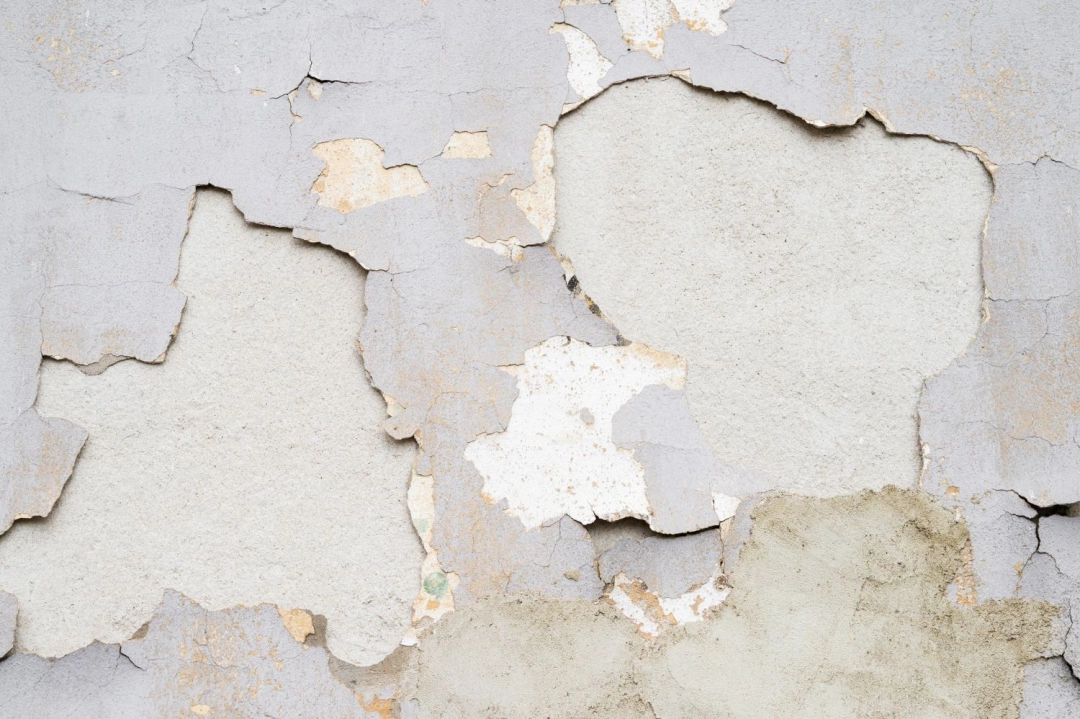
Plaster is the smooth skin that covers most walls and ceilings. It hides bricks, blocks or boards and gives every room a neat, clean look. When plaster cracks, chips or falls away, it can spoil the look and weaken the surface beneath.
A professional plastering repair makes the surface safe and neat again. Trained plasterers use the right tools and mixes and follow proven steps. This means a stronger finish and less mess for you compared with do-it-yourself fixes.
This guide explains what to expect when you invite a plasterer into your home. You will learn how damage is checked, what happens on work day, how long the job may take and the care that follows. Knowing these points helps you plan and gives you peace of mind.
Every building is different, yet the stages of repair share many common steps. By understanding each stage, you can speak with confidence, ask clear questions and spot good workmanship. Clear knowledge leads to better decisions and a smoother experience.
How a Plasterer Assesses the Damage Before Starting Work
Looking for Cracks, Holes, or Loose Plaster
The plasterer begins with a close visual sweep. They move light across the surface to pick out fine cracks and dents that daylight can hide. Even a hairline crack can widen over time, so every flaw is noted.
They also run their hand over the wall, feeling for slight bumps or hollow spots. A gentle tap with the handle of a trowel produces a dull sound where the plaster has lost grip. Marking these spots helps map out the area that must be cut back.
Checking for Signs of Moisture or Water Damage
Water is the silent enemy of plaster. The expert looks for brown stains, peeling paint or a soft, crumbly feel. They may use a simple moisture reader to confirm damp levels inside the wall.
If plumbing or roof leaks are suspected, the plasterer will advise fixing the source first. Covering damp walls with fresh plaster traps moisture and leads to mould later. Solving the root cause saves future costs.
Testing the Surface Strength
Older homes may use lime plaster that reacts differently from modern gypsum. The plasterer scrapes a small spot to judge hardness and find weak, powdery patches.
Where the backing is weak, the plasterer may plan to apply a bonding coat or reinforcing mesh. These steps create a firm base so the new finish stays smooth for years.
Taking Measurements and Planning the Work
After mapping the defects, the plasterer measures the width and height of each area. Measurements let them order the correct amount of plasterboards or beading and avoid waste.
They then explain the method, cost and time frame to you in plain language. A clear plan covers preparation, repair, drying time and cleanup. This open talk builds trust.
At this point, you should feel confident that every hidden issue has been uncovered. A full picture of tasks, cost and drying time helps you decide whether to stay home during work or spend a day elsewhere.
Need assistance finding plastering repair near you?
Get a QuoteWhat Happens on the Day the Plastering Work Begins
The work day starts with careful protection of your home. The plasterer moves furniture away from walls and covers items with clean sheets. Doorways may be sealed with thin plastic to stop dust from drifting to other rooms.
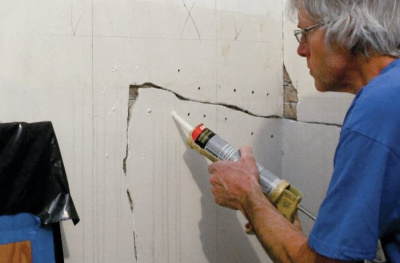
Next comes the removal of damaged plaster. Using a scraper, club hammer and bolster chisel, the worker chips away loose sections until they reach firm edges. This noisy stage is shorter when the earlier survey has mapped boundaries well.
The fresh surface is then brushed and washed to remove dust. A bonding agent or grit primer is rolled on. This sticky layer helps new plaster grip strongly to brick, block or old plaster.
Plaster is mixed in a clean bucket by hand or paddle drill. The mix must be lump-free and thick like creamy yoghurt. The plasterer lays on the first coat with sweeping strokes, pressing firmly to squeeze out air.
Between coats, the plasterer may run a straight edge across the surface in long smooth strokes called ruling off. This action shaves away high spots and fills tiny hollows, leaving a perfectly even plane ready for finishing.
If the repair involves a ceiling, extra care is taken to prevent drips. The plasterer may use a sturdy hop-up platform for safe access and apply the mix slightly thicker so it stays in place while setting.
After a short set, the second coat is added to build up the depth. Each coat is ruled flat with a straight edge and then trowelled smooth. Corners are shaped with angle beads to keep them crisp.
At last, a thin skim coat brings a glass-like finish. The plasterer polishes the surface with light passes of a clean trowel and a mist of water. When light reflects evenly, the wall is ready to dry.
How Long It Takes and What Disruption to Expect
Small patch repairs, such as a single crack, can be finished in half a day. A medium-sized room with several damaged spots often takes one full day of active labour. Large areas or ceilings may need two days, especially when replacing sections of backing board.
Drying time stretches the calendar even when the wet work is done. Fresh plaster changes colour from dark pink to pale blush as moisture leaves. In a warm, airy room, this can take two days. In cool or damp conditions, it can take five days or more.
During drying, you should keep windows open a little and run gentle heat if safe. Avoid strong heat, as this can make the surface crack. Do not paint, wallpaper or push the furniture back until the colour is uniform and the surface feels powder dry.
Noise, dust and restricted room use are the main disruptions. A tidy plasterer will sweep up rubble into bags as they work and use a sponge to wipe tools outside. They should carry a vacuum for fine dust. Clear talk before the job helps you plan your family life around the mess.
Planning around noise and access makes life easier. You may wish to shift pets to a quieter room and ask children to play outside. Simple steps like closing wardrobe doors protect clothes from fine dust.
What Good Plasterers Do After the Repair Is Complete
Cleaning the Work Area
Once tools are packed away, the plasterer folds dust sheets inward so loose debris stays inside and does not drift across the flooring. They sweep or vacuum the floor and wipe skirting boards and window sills.
Bins for rubble and empty bags are removed from the site. Any small spots of plaster on tiles or glass are soaked and sponged off, leaving no trace.
Good tradespeople respect your property as if it were their own. They wipe door handles and light switches touched during the job and check that paths outside are clear of any stray materials before leaving.
Giving Drying and Aftercare Advice
Before leaving, the tradesperson explains how to look after the new surface. They remind you not to close windows fully so gentle airflow carries moisture outside.
They will suggest using a breathable mist coat of watered-down emulsion as the first layer of paint. This coat soaks in and seals light powder. Standard paint or wallpaper can then go on after twenty-four hours of extra drying.
Checking for Customer Satisfaction
A reliable plasterer stands back with you and shines a torch across the surface to reveal any slight marks. If they spot a ridge or pinhole, they patch and polish it before declaring the work finished.
They provide a simple written receipt that states the type of plaster used and any promise to return if cracks appear in the first year. This record gives you comfort and can help when selling the property later.
In this article: