Septic Tank Installation in the UK: What to Expect
Installing septic tanks in the UK is a significant project for homes that are not connected to mains sewerage. A well-planned system deals with household waste water safely and reliably, but only if the design and installation are carried out with care. Knowing what to expect at each stage will help you choose the right option, prepare your property, and stay on the right side of the rules.
This article explains the full installation journey in plain terms. You will learn how the process works, what influences price, the legal duties that apply, and the steps you can take to make the job smoother. The aim is to give you clear and practical guidance so you can make confident decisions before any ground is broken.
The Septic Tank Installation Process
Every successful installation starts with careful planning, clear communication, and the right technical choices. Septic tanks are not one size fits all. Soil type, slope, access, household size, and local rules all affect the design. A good installer will turn these constraints into a safe and efficient system that suits your site.
Initial Site Survey and Feasibility
The first step is a site survey. A specialist will inspect your plot, measure distances from buildings and boundaries, and look for services such as water pipes or cables. They will take note of slopes and access points for machinery. Ground conditions are critical, so percolation tests may be used to understand how well your soil drains and whether a drainage field is suitable.
Design, Sizing, and Permissions
Using the survey findings, the installer will design the system. The tank size is usually based on the number of bedrooms or people in the home. The design sets out pipe routes, ventilation, inspection chambers, and the layout of the drainage field or other discharge method. At this stage, the installer will advise on permissions and Building Regulations, and whether permits are required for the planned discharge.
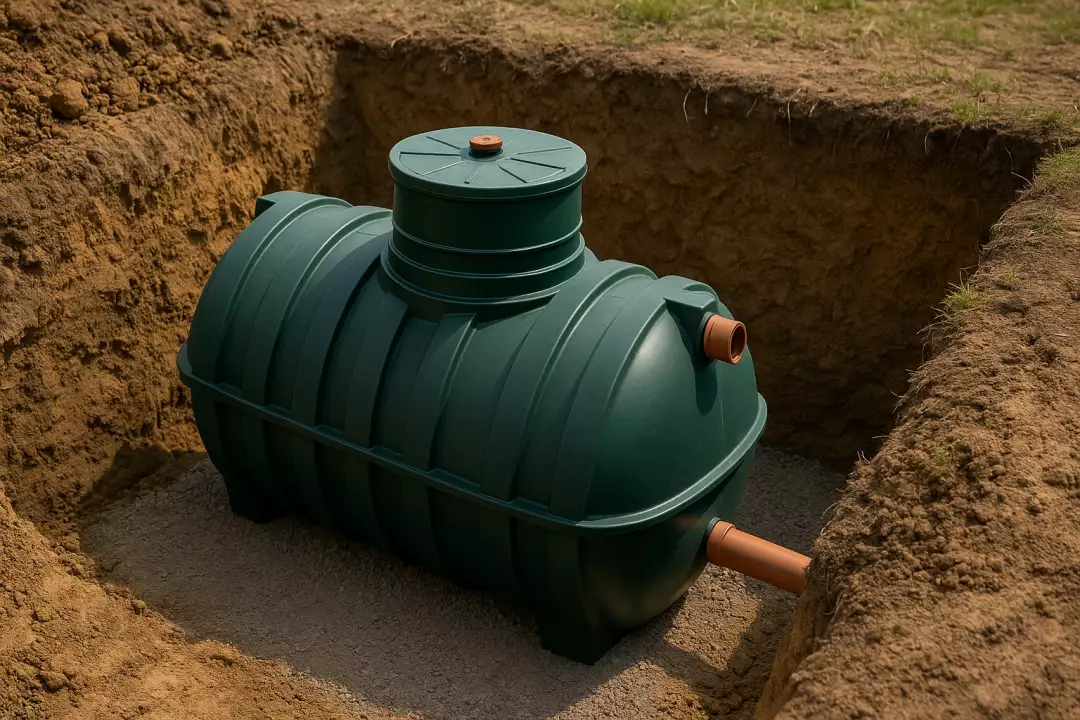
Excavation, Base Preparation, and Tank Placement
With approvals in place, groundworks begin. The pit for the tank is dug to the correct depth and width, with a stable, level base to prevent settlement. The tank is lowered into position, connections are aligned, and backfilling is carried out evenly while the tank is filled with water to balance pressure and protect the structure.
Pipework, Drainage Field, and Commissioning
Pipes are laid with a steady fall, and inspection chambers are installed for maintenance. If a drainage field is used, trenches are filled with graded stone and perforated pipes, then covered and reinstated. Before handover, the system is tested for levels, joint integrity, and free flow. You should receive a plan, safety notes, and routine care guidance.

Need assistance finding septic tanks near you?
Get a QuoteCosts and Factors That Influence Pricing
The cost of installing septic tanks varies because each site is different. A small, simple system on free-draining ground with good access will be far cheaper than a complex build on a tight plot with heavy clay and a high water table. It helps to understand the main cost drivers so you can compare quotes fairly and spot when scope has been left out.
Tank size is a major factor. Larger tanks cost more to buy and place, and they often require deeper or wider excavations. Ground conditions shape the budget as well. Poor drainage leads to bigger or more advanced soakaway solutions. High groundwater may require concrete surrounds or anchoring to prevent the tank from floating. If your home is far from the installation area, longer pipe runs and extra chambers may be needed, which adds materials and labour.
Access influences both time and risk. If an excavator and delivery lorry can reach the work area directly, the job is faster and safer. If access is narrow or steep, teams may need smaller plant, extra manual handling, or a temporary trackway. This slows progress and can increase costs. Professional fees and permissions, such as design work, permit applications, and inspections, should also be included. Tanks need periodic emptying by a licensed waste carrier, so remember ongoing costs when planning your budget.
Legal and Compliance Considerations
Septic tanks are regulated to protect water quality and public health. As the property owner, you are responsible for ensuring your system is compliant. The rules cover where a system can be sited, how effluent is discharged, and how the installation must be built and maintained. Understanding these points early can prevent delays and costly changes later.
Most domestic systems fall under the General Binding Rules for small sewage discharges. These rules set limits on daily flow, require a suitable drainage field for ground discharge, and restrict discharges near wells, streams, and protected areas. Direct discharge from a septic tank to a watercourse is not acceptable, so if you need to discharge to a ditch or stream, you will usually require a package treatment plant that provides higher treatment. In some cases, a permit will also be needed, especially in sensitive locations.
Building Regulations apply to the design and construction of the system. They cover structural stability, ventilation, and access for maintenance. Local planning policies may also apply, particularly in conservation areas or near boundaries. Always keep records of the design, test results, permits, and maintenance, as buyers and regulators may ask for proof.
How to Prepare for a Smooth Installation
Good preparation reduces risk and helps the work finish on time. By organising information, choosing the right team, and getting the site ready, you can avoid common delays. Clear decisions made early usually save money later, because changes during excavation are harder and more expensive to implement.
Choose Qualified, Transparent Installers
Look for installers with proven experience in septic tank projects. Ask for evidence of training, insurance, and health and safety procedures. Request recent references and photographs of similar jobs. A professional team will provide a detailed proposal that lists the scope, exclusions, and assumptions. They should also explain how they will protect your property, manage spoil, and reinstate the ground after completion.
Communication is a strong predictor of success. Agree on a single point of contact and set times for updates. Make sure you understand the programme, the payment plan, and what happens if the team finds unforeseen conditions such as buried rubble or soft spots. When expectations are clear, decisions can be made quickly, which keeps the project moving.
Prepare the Site and Plan Access
Before the start date, clear the working area of furniture, sheds, and planting. Mark underground services if known, and arrange temporary relocation of pets or livestock. Plan where vehicles can park and where spoil and materials will be stored. If access is tight, agree on a route and consider removing a fence panel or gate to create a safe space for machinery.
Think about the wider impact on your home. Short periods without drainage may be needed while connections are made. Plan for basic facilities for the team, and discuss dust, noise, and delivery times with neighbours if space is shared. Small steps taken in advance can prevent disputes and help the work proceed calmly.
Plan for Handover and Long Term Care
A system lasts longer with simple care. Ask your installer for a user guide that explains safe use, what to avoid flushing, and how to spot early signs of trouble. Keep a copy of the as-built drawing and service records in a safe place. Book the first emptying at a sensible interval based on the tank size and household use, then set reminders for regular checks.
Finally, decide how you will handle future changes. If you add bedrooms or increase occupancy, the system may need review. If you plan extensions, check that the drainage field will not be covered or compacted. Taking a long view will protect your investment and keep your home compliant and comfortable.
In this article: